how to build and publish your own blog
Created: 2021-06-06 23:57:18
Modified: 2021-7-5 09:35:48
quickly see
|
Note: if use AppVeyor, you can check building in https://ci.appveyor.com/projects.
use hexo
Guides
Refer to Documentation | Hexo.
In local, to build your blog by hexo, you need to make sure Git and Node.js installed in proper version, then you use npm to install Hexo globally:
|
In the beginning of a hexo blog, hexo init is used to create basic hexo source by cloning hexo-starter and default themes/landscape, and installing some basic dependencies into node_modules/ according to default package.json, before you change theme of your blog personally when you clone the Themes and install some specific theme dependencies according to related document like README.md by using the following line format:
|
Due to --save option and usage of npm install in root of hexo source, new modules installed manually are added to package.json which make it complete containing the whole blog dependencies.
Configure and rich your blog, make _config.yml, themes/(like ***/_config.yml) and source/ personal.
In order to deploy your blog to your GitHub Repo, hexo generate is used to generate static files in public/, then hexo deploy push them to your Repo in one shot, so you need to configure the Repo information in _config.yml in advance, and you can set SSH key to skip the password-inputting process.
what to do
In Windows 10,
refer to 搭建个人博客-hexo+github详细完整步骤 - 简书 (jianshu.com).
Note: there maybe some compatibility issues between latest Node v14 and hexo, you can downgraded to Node v12.22.2 (LTS) to solve it usually, refer to Windows下完全卸载node.js并安装node.js的多版本管理工具nvm-windows_不积跬步,无以至千里-CSDN博客_windows卸载node, or upgrade to hexo v4.2.1, refer to Regression in Node 14 · Issue #4260 · hexojs/hexo (github.com). There maybe other issues with stylus, refer to NodeJS 14 warnings · Issue #2534 · stylus/stylus (github.com).
In Ubuntu,
refer to 从零开始建立一个属于你个人的Hexo博客 | 可乐博客 (cokemine.com), 如何在Ubuntu 18.04上安装Node.js和npm (myfreax.com).
configure deploy
Configure the Repo information in _config.yml, refer to 设置 SSH 使用 hexo deploy 时免输用户名密码 - SegmentFault 思否:
|
hexo
refer to 指令 | Hexo, hexo常用命令笔记 - SegmentFault 思否.
Migration
To rebuild your existing hexo blog on other local device, you need to make sure Git and Node.js installed in proper version, then you use npm to install Hexo globally:
|
Meanwhile, you can clone your hexo source from GitHub that you push from your initial device before. You need to configure the user of the source and would better set SSH key for push and pull later.
After that, you cannot use hexo init directly to Initializes this hexo source, but install all of the dependencies into node_modules/ according to package.json instead
|
and then make sure the specific theme dependencies installed as well, you can check modules list:
|
After update you blog content in local, you can use hexo generate to generate static files in public/, and use hexo deploy to push them to your blog Repo. On the other hand, you need to update the hexo source on GitHub by push.
AppVeyor
what is AppVeyor and how to use it generally, refer to Welcome to AppVeyor | AppVeyor.
Guides
AppVeyor server works as a remote device, but you cannot set you SSH key easily on it and interact with it during its building work, instead you can use a Personal Access Tokens to access your GitHub.
AppVeyor can monitor your source Repo and if there is something updated, it will handle your Repo according to a appveyor.yml file, like
|
what to do
refer to , 用Hexo、Github Pages和Appveyor搭建你的私人博客 | Richard Qiu的博客 (supermizar.github.io), Hexo博客进阶教程(二)| 使用Appveyor备份并持续集成博客 - 云+社区 - 腾讯云 (tencent.com).
troubleshooting
themes
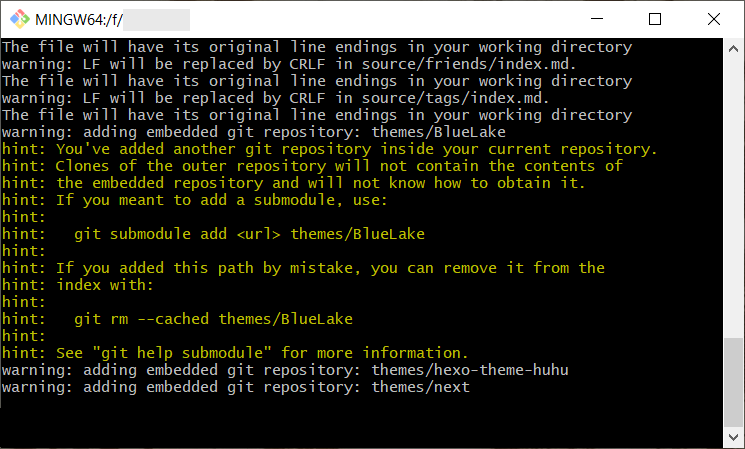
there maybe problems with pushing themes/*** because your theme is actually a git repo, my workaround is to push those directories manually:
|